Frequently Asked Questions

Buying Thunderbirds Pinball Machine

Thunderbirds Pinball machine is available directly from Distributors in your country, or, if no distributors are available to service you, we can ship directly to you (whether door to door, or, to port/airport service).

Purchase in confidence, as either your local distributor, or, Highway Games will help with all delivery, and ongoing service support.

Game is too Easy/Hard?

The default setting on the pinball machine is on “EASY” allowing novice players to enjoy pinball game play. However, this setting is not suitable for experienced pinball players.

After receiving your pinball, please set the difficult (and other game settings) to match your experience by going into the software menu (GAME SETTINGS) and adjusting difficult, ball lock times, extra ball settings, etc…

How can I troubleshoot when a playfield switch is not working?

The game adjustments menu features a test mode to help diagnose issues with game switches. If you navigate into the switch test mode and then activate switches, it will show which switches are detected. The service manual also includes a full copy of the switch matrix to assist in diagnosis.

How can I adjust the volume level?

The speaker volume can be adjusted with the Volume Up/Volume Down red buttons on the button panel inside the coin door.

How do change the game settings?

The game adjustments menu is accessed with the button panel inside the coin door. Grey buttons are used to enter and exit menu options, and the flipper buttons are used to navigate between options.

The ball isn’t launching into the plunger lane.

This can be caused by the balls in the trough not being seated correctly, and this may happen after the playfield has been raised to the upright position. Please check that the balls in the trough are properly seated.

How can I update the code on my machine?

Game code is stored on a daughterboard module, which can be removed from the MPU main board and replaced. Please contact your Homepin Authorized Dealer to see if there is an update available for your machine.

What are EOS switches?

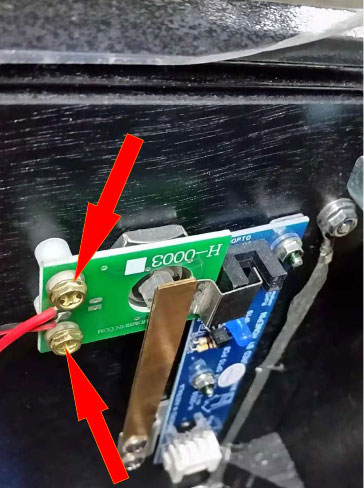
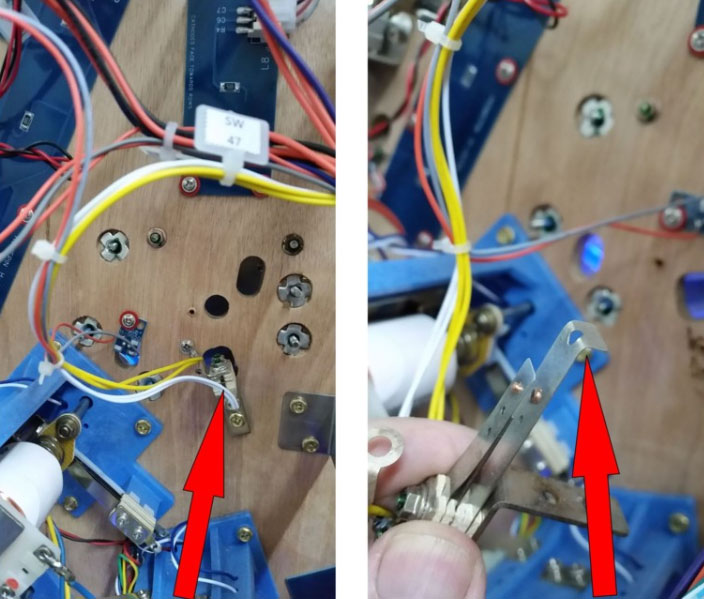
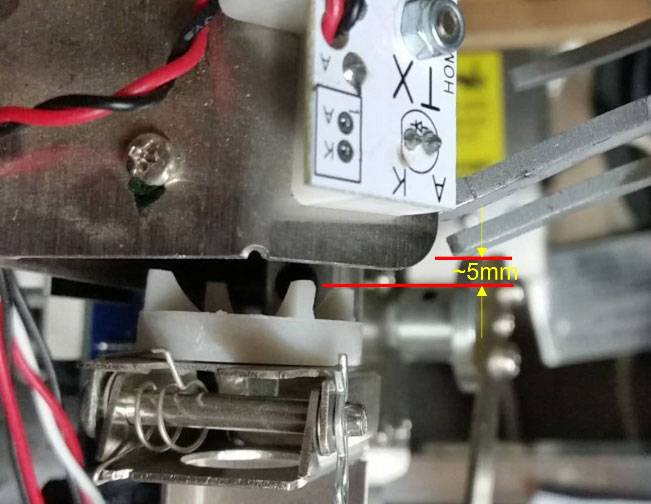
EOS stands for End Of Stroke. These switches are part of the flipper mechanism and let the machine know when a flipper is in the “up” position. It is important that these can operate correctly as they are designed to reduce wear and prevent burn-out on the high power flipper coils.

Why does the Game give replays at first switch closure OR seems to do random things such as incorrect DMD display or audio clips?

Gives replays at first switch closure OR seems to do random things such as incorrect DMD display or audio clips.
(Application: All machines.)

Cause: Usually this is a result of the memory becoming corrupted after a re-program OR making numerous adjustments to many different menu
settings OR some other outside influence.

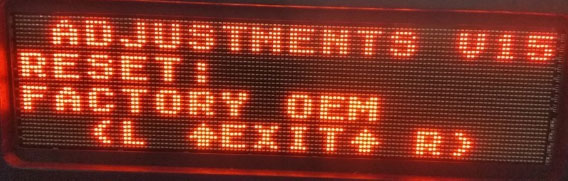
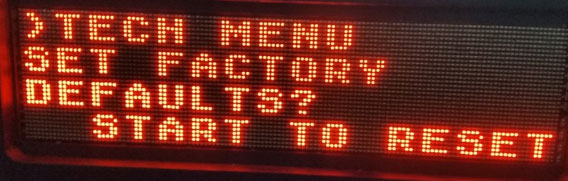
Solution: In the service menu we have provided a “factory OEM reset”.
This returns most settings as they were at the factory.
Also ensure that the setting for auto percent is set at “1 percent

GAME SETTINGS > AUTO REPLAY = “1 PERCENT”

After ANY re-program or if the machine seems to be doing random things, the very next step is to navigate to the Factory OEM reset and do a reset.
This literally only takes seconds


How do I replace the plastic ramp with the new stainless steel ramp?

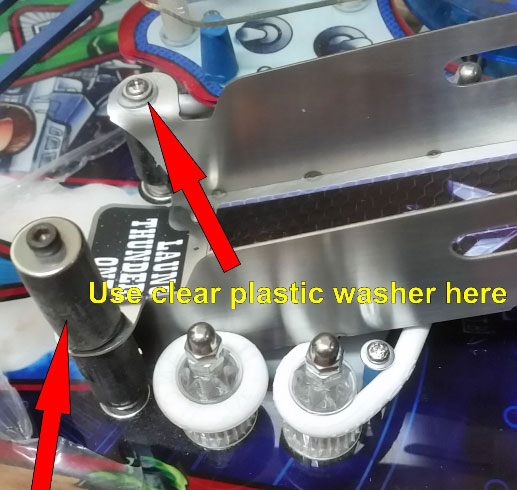
Please DO NOT skip any part of these instructions to replace the ramp.

(1) Identify all parts supplied.

Lower Left Ramp Screw and Plastic Washer

Top Ramp Screws

LED Assembly

Upper Ramp Rubber Ring Post

2mm Switch Spacer

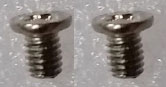
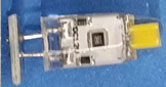
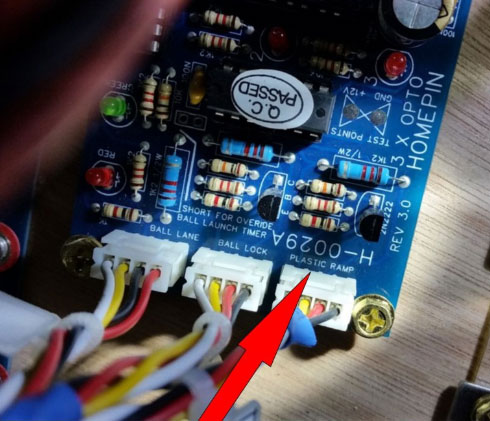
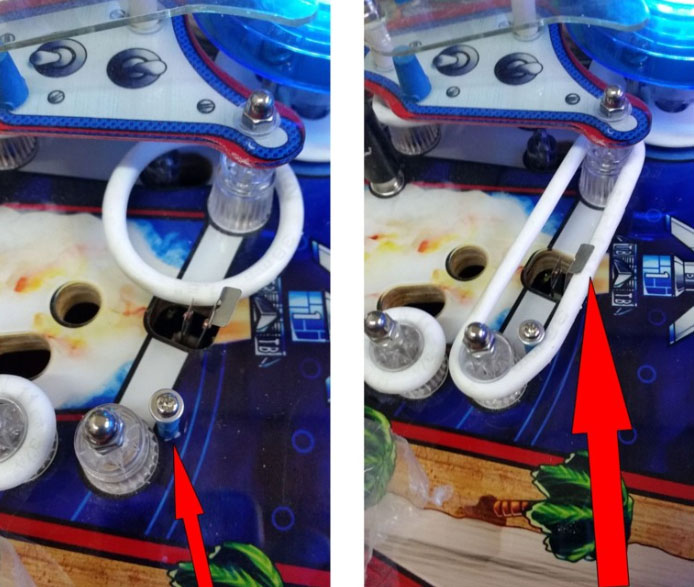
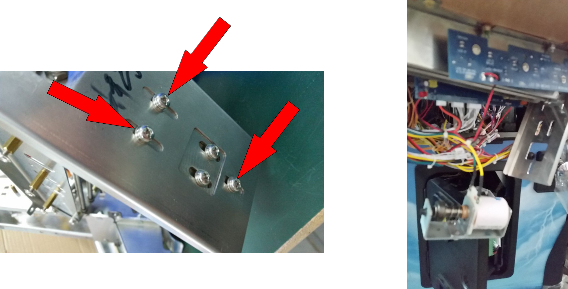
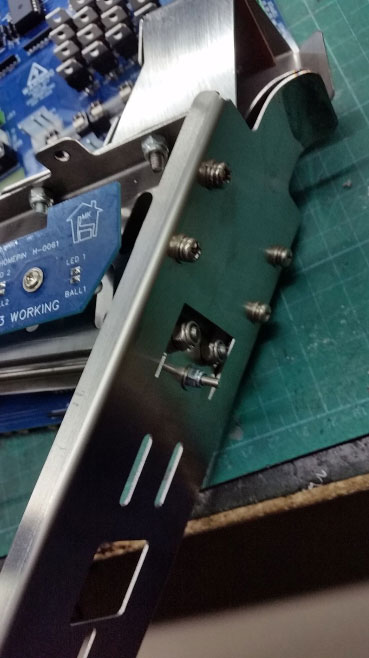
(2) Locate and unplug the plastic ramp opto from the 3 x opto board, H-0029. Clip any cable ties holding the opto wires back to the ramp. Unscrew and remove the plastic ramp.

Called “Plastic Ramp” on the 3 opto PCB

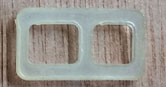
(3) Unscrew original opto mounting bracket and set it aside.

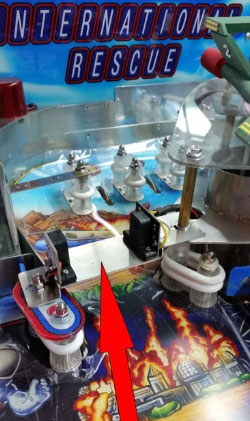
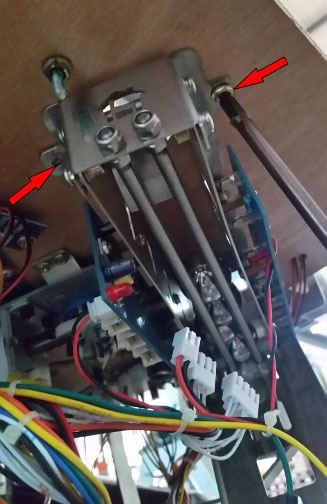
Original Opto mount bracket

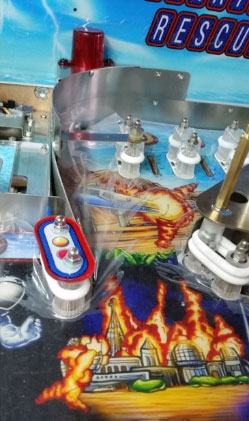
Bracket Removed. Screws Refitted

(4) Relocate the small lamp board mounted under the ramp as shown

Relocate the lamp board under the ramp entrance

NOTE:Please check the LED before relocating it. Living under the plastic ramp, some have been broken by the ball running up the ramp. Replace the LED if yours is broken.

Top of LED broken off

(5) Remove switch 47 and bend the top of the large blade as shown and also bend both contact blades forward as you will be moving the actuating rubber slightly. Refit the switch ensuring a 2mm spacer is between it and the wooden playfield.

Remove SW47 and bend top of leaf down as shown so rhat it doesn’t touch the new metal ramp. Refi the switch using a 2mm spacer

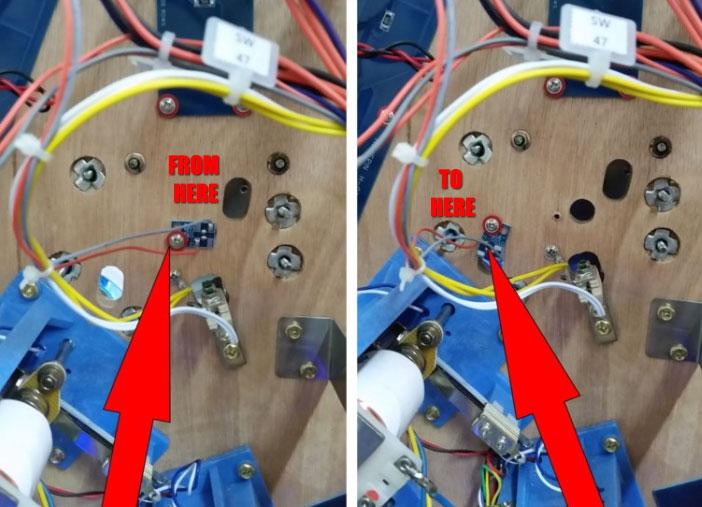
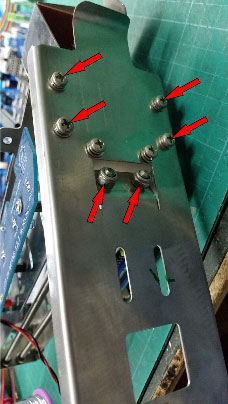
Note: Both sw. leaves will need bending forward because we will relocate the rubber that it rests on.

(6) Drill a 3mm hole as shown and screw in the new post. The exact position isn’t critical but you need to move the rubber forward slightly so the ball won’t get stuck under the new ramp.
CAUTION: Drill through the PETG surface ONLY – do NOT drill further or the new post won’t screw into the wood.
NOTE: Ensure your new post placement won’t foul the new ramp when it is in position.

Drill a 3mm hole and screw in the new post with the blue plastic sleeves. Refit the rubber and check the adjustments of SW47

(7) Reuse the aluminium cable cover from the old opto bracket and fit it to the bottom of the new ramp.

Use the original aluminium wire cover and fit it under the new ramp optos

 (8) Snuggle the new ramp into place and fit the front mounting screw with plastic washer and then the rubber post assembly.

Refit front left mounting screw and right side guard post

(9) Fit the top screws. It might be that only one will fit your bracket depending on the hole spacings of the bracket in your machine. You can remove the bracket and drill a new hole but it really isn’t required. The stiffness of the new assembly means a single mounting screw will suffice.

Fit rear mounting screws – it may only be possible to fit one. If so, fit the left side one.

(10) Ensure you thread the new opto wires through the playfield and plug them in to the 3 opto board (‘plastic ramp’ position).
(11) Enjoy your new stainless steel ramp!
 
How do I Upgrade the Playfield Hanger Bracket

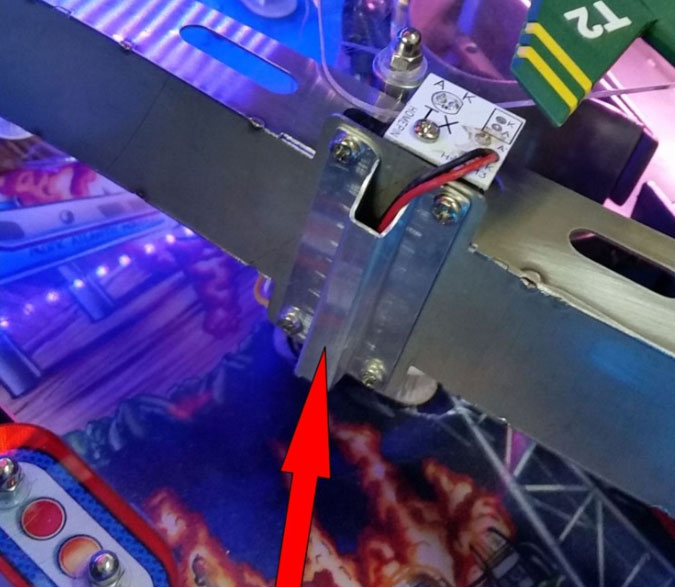
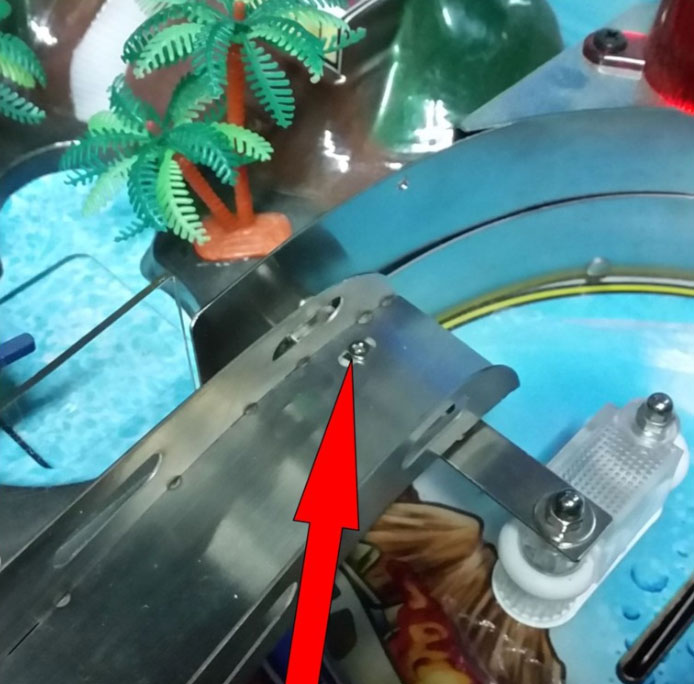
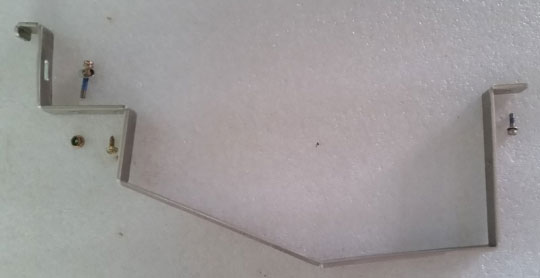
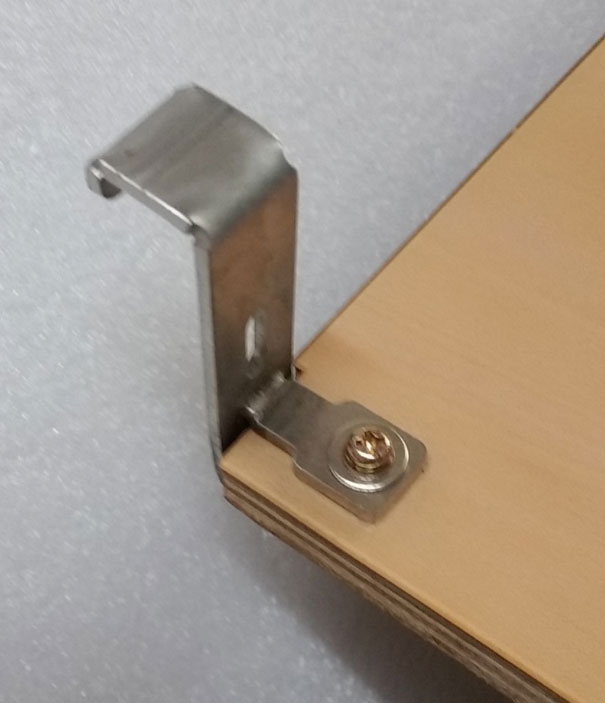
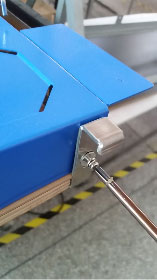
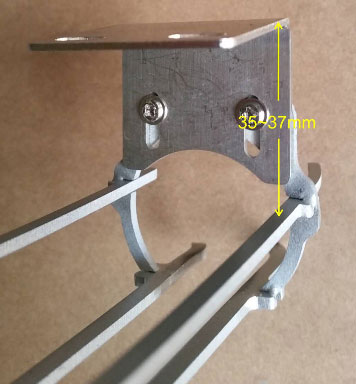
Playfield Hanger Bracket Upgrade

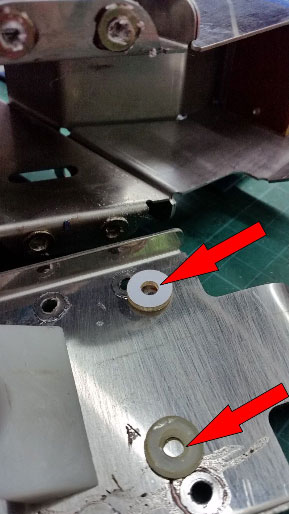
(originals can break in transit when machine is shipped on its end)

(1) Unscrew and remove the blue apron
(2) Put the playfield onto the PF prop.
 
(3) Remove the three screws holding each bracket to the playfield.
(4) Slide the replacement brackets onto the front edge of the playfield and refit the three screws. Refit the blue apron.
 
How Do I upgrade the Trough

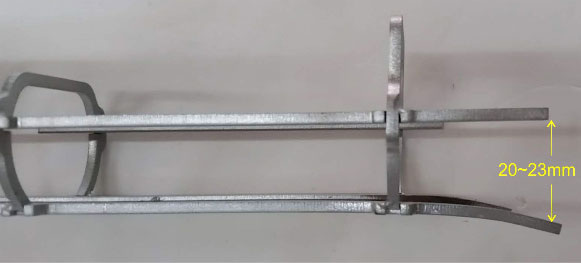
Trough Upgrade (replace front metal frame)

(1) Remove balls from the trough (unlike me when I took these pictures)

(2) Remove the two screws holding the apron and take off the apron.

(3) Remove the four screws holding the “ball trap” mechanism cover in place and remove the cover and the railway train inside (the base can stay in place).
(4) remove the three screws that secure the coil and its frame to the main trough mechanism and carefully allow the coil to hang by the wires.
Unplug the three connectors from the trough PCB.
 
(5) Remove the four screws holding the trough mech into the playfield and it will be easy to remove it.
 
(6) Once on the bench, remove the two locknuts and four screws that secure the plate to the front of the mechanism.
 
(7) Remove the front plate and if your mech has two x 2mm plastic spacer washers fitted with the top two screws, discard these (no longer required) as well as the old front plate.
 
(8) Fit the replacement front plate with the four screws and two locknuts and re-fit the mech to the playfield.
 
How do I adjust the Subway if the ball falls into the bottom of the cabinet?
Ball sometimes falls into bottom of cabinet instead of lodging in Tracy Island lift mechanism.
(Application: All machines)
Cause: Usually this is a result of the subway wireframe not being adjusted correctly.
Solution: Some early production machines will require the ends of the wireframe to be bent – please follow the description below.
Lift the playfield and remove the subway wireform (3 screws).
Confirm the bend on the ends of the frame as well as the adjustment height of the mounting bracket conforms to the following pictures.
Once the subway wireform is confirmed to fit the measurements, re-fit it to the playfield so the end of the wireform meets the Tracy Island mechanism with the measurements shown below.
The mounting position of the wireform at the ball entry end is not critical.
What do you only accept bank payments for machine orders?

We only accept payment via bank transfer (T/T), $1,500usd deposit to start the production, and balance is due once machines are ready for delivery.

Due to the high level of credit card/Paypal fraud, our company group no longer accepts these payments for machine orders.

Why are the Australian prices listed more expensive than the American Prices?

In the pricing, please factor the exchange rate loss between the AUD/USD as well as we need to add 10% tax onto the costs for Australian customers.

Do I need to pay in full when I order my machine?

We are asking our customers pay $1,500USD (or $2,000AUD) as a deposit to secure your order. The final balance is due before the machines are shipped from the factory.

We can work together with you for payment plans (please note however, we can only ship the machines once we receive full payment).

What is the warranty period?

All products offered by Highway Games come with 12 months warranty. Highway Games prides itself on plug and play serviceability, with the ability of owners to self-diagnose and easily repair any faults.

What about spare parts in the future, where do I purchase these?

Highway Games is part of Highway Group, with various companies around the world including a spare parts division in Hong Kong – www.arcadespareparts.com. We plan to have the Thunderbirds pinball spare parts available for purchase online, shipping internationally only takes few days from Hong Kong.

Please note, proprietary boards are not available for sale and only on repair/exchange basis.

Your local distributor should also have stock on hand.

Do you ship worldwide?

Yes. We ship daily around the world.

To receive an accurate freight quotation, please email our team and let us know what is your nearest seaport as well as delivery address. We will do our best to support you.

Where are the goods located, and is freight free?

Thunderbirds Pinball machine is manufactured in China, with machines available ex warehouse Shenzhen. Freight is not included.

Highway Games can help with all transport needs, from full container orders to single door to door shipments.

Where can I find manuals and servicing information?

Manuals, Software updates and Service bulletins can all be found on our Services page.

Please click the link below or navigate to the page using the top menu.

They can also be found at Homepins service page via the link below

How can I fix flipper buttons sticking?

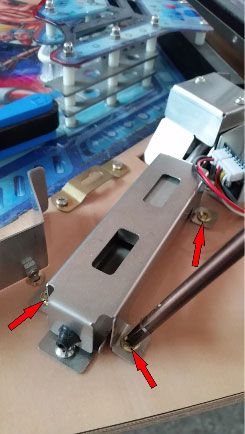
Flipper buttons stick in sometimes (Application: All machines.)

(1) Remove LED button illumination PCB (2 x screws) on the affected side.

(2) Remove the “C” clip that holds the button in the housing –
CAUTION – it is spring loaded and will fly out possibly resulting in the loss of the spring. Note the direction of the spring for refitting.
(3) Using #400 wet & dry sandpaper, clean the end of the shaft from any rough spots.
Usually only the end 50% will need attention.
(4) Refit the button and “C” clip and check for smooth operation.
Refit the LED PCB.